Integrate GitLab with BoostSecurity
BoostSecurity provides an integration with GitLab that will enable you to inventory your GitLab repositories, conveniently provision security scanners onto those repositories, and visualize GitLab data in the Boost dashboard, rewarding you complete visibility into your organization's GitLab activity.
Prerequisites
To install the BoostSecurity GitLab integration, prepare the following:
-
Create a GitLab Access Token with the
apiscope selected. This access token can be:In all cases, the token must have the
apiscope enabled.-
It advised that a protected, non-human GitLab account (such as a service account or bot user) be used to generate the token. Using a token tied to an individual's personal account increases the risk of the integration breaking if that user is offboarded or removed due to internal changes.
-
The entity that the Access Token is assigned to will need to have
Ownerpermissions for the repositories that are associated with the GitLab groups that are being ingested into Boost.
-
-
Create a
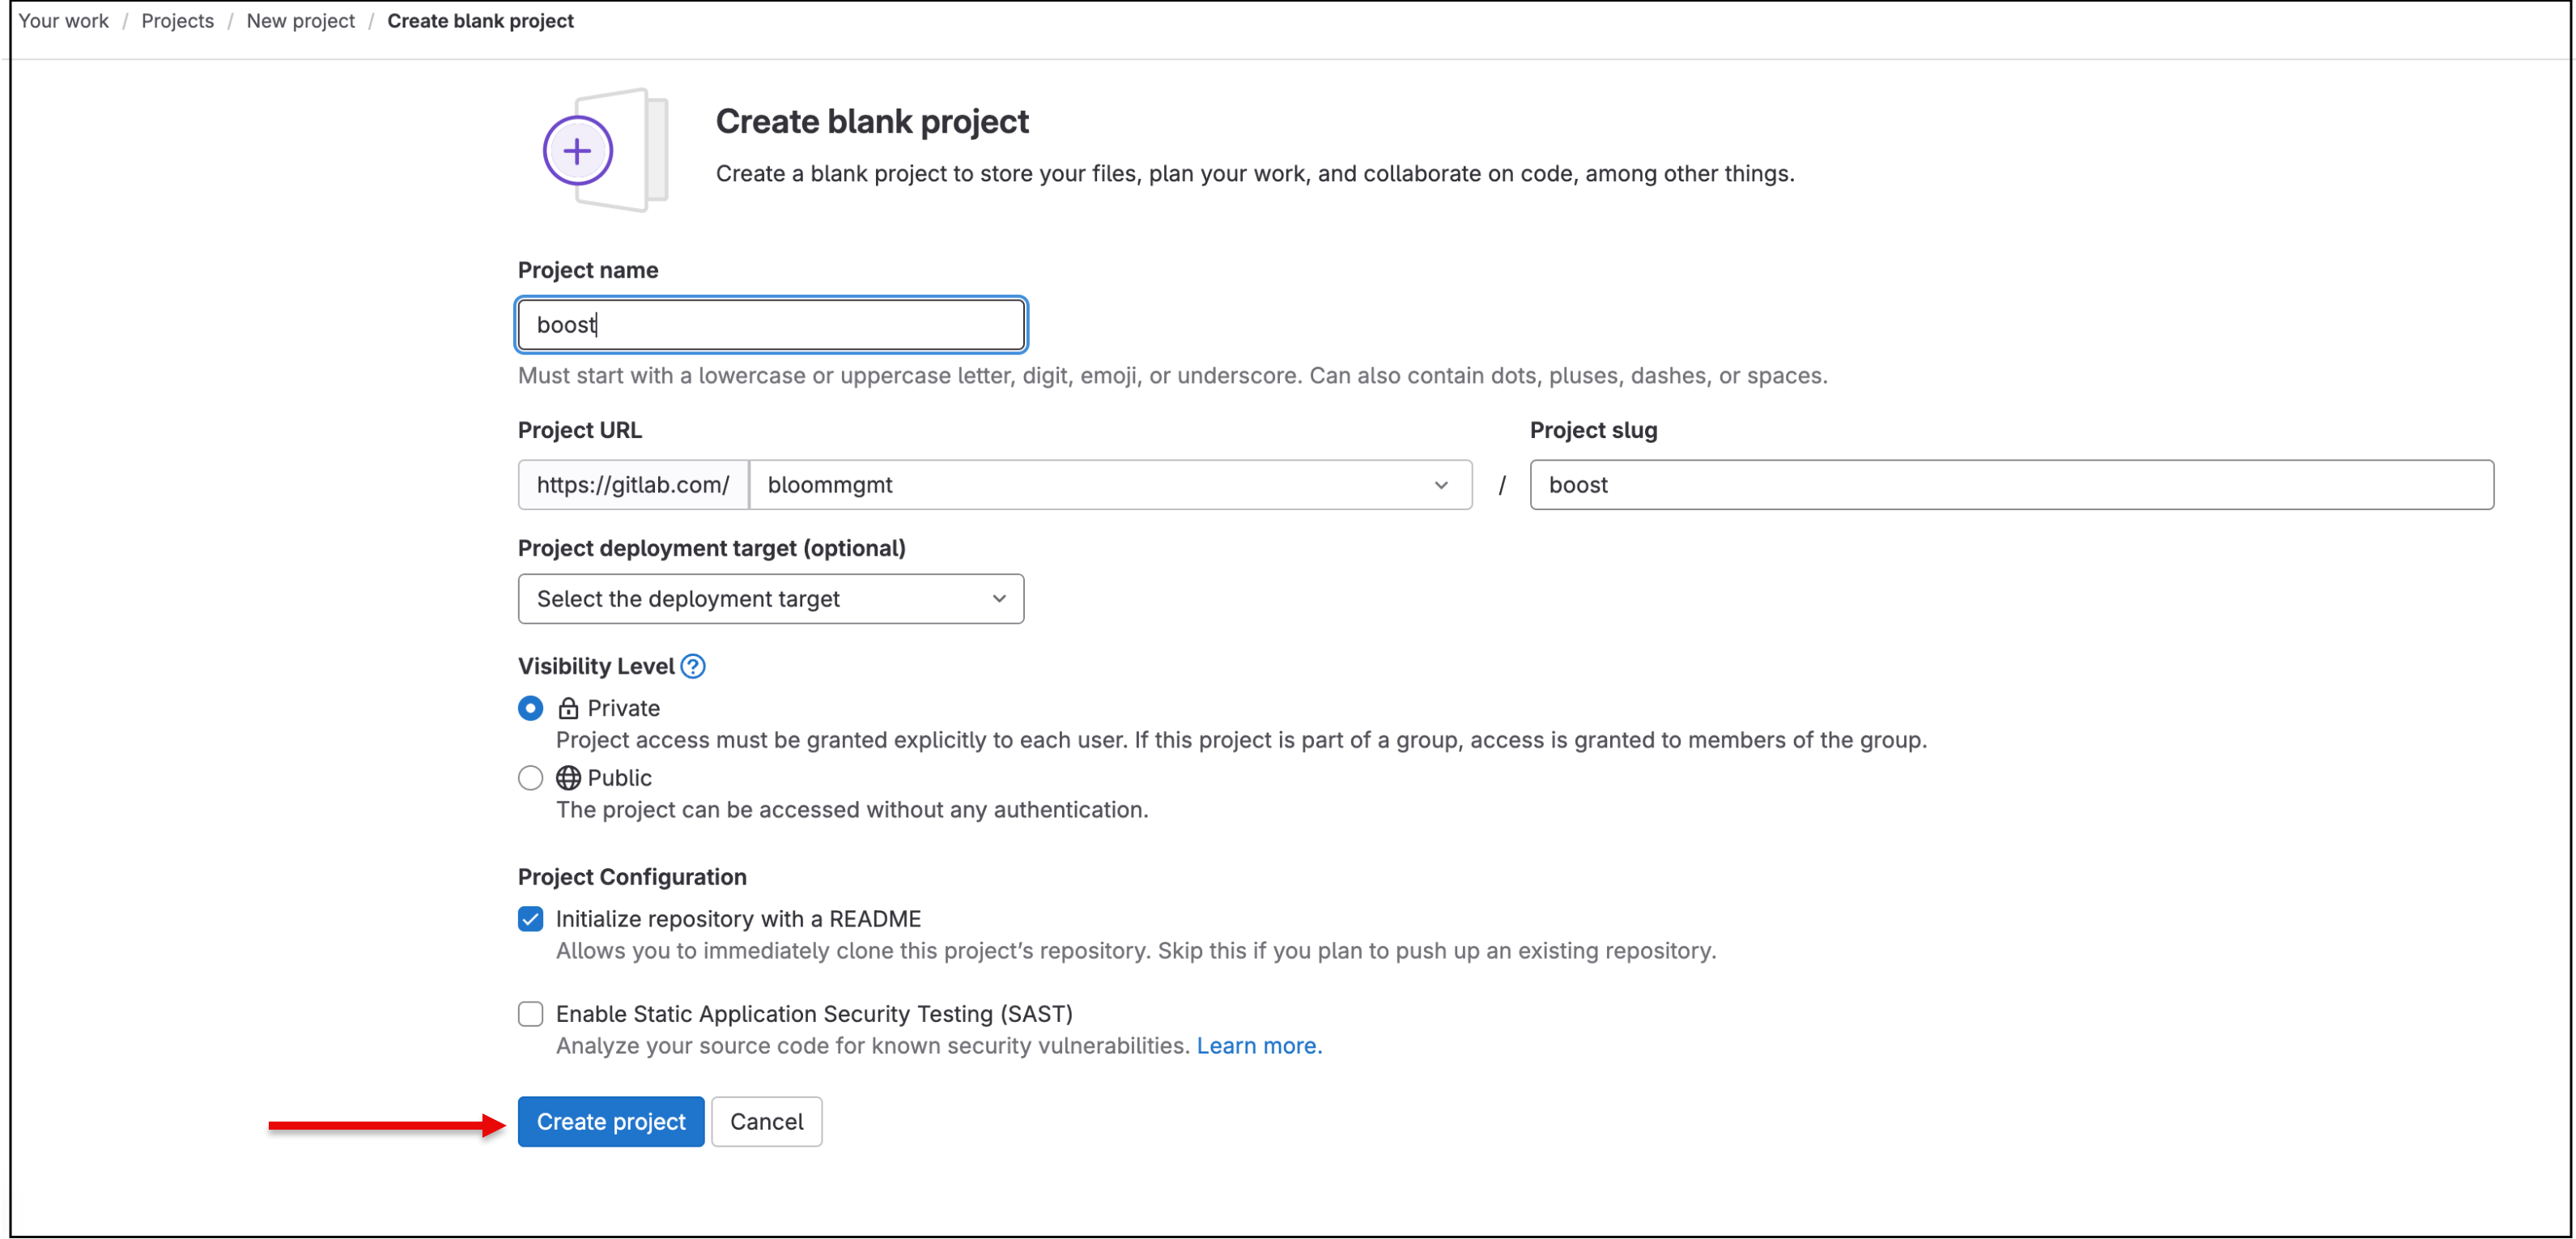
boostrepository within your organization's SCM, which should contain aREADME.mdfile. To do this, go to your GitLab organization where you installed BoostSecurity and create a newboostproject that contains a Readme file.- Ensure that at least
boostrepository owners can define pipeline variables. That is in GitLab Settings --> CI/CD --> Variables set the minimal role to use pipeline variables to the owner role.
- Ensure that at least
Install the BoostSecurity GitLab Integration
-
Navigate to the
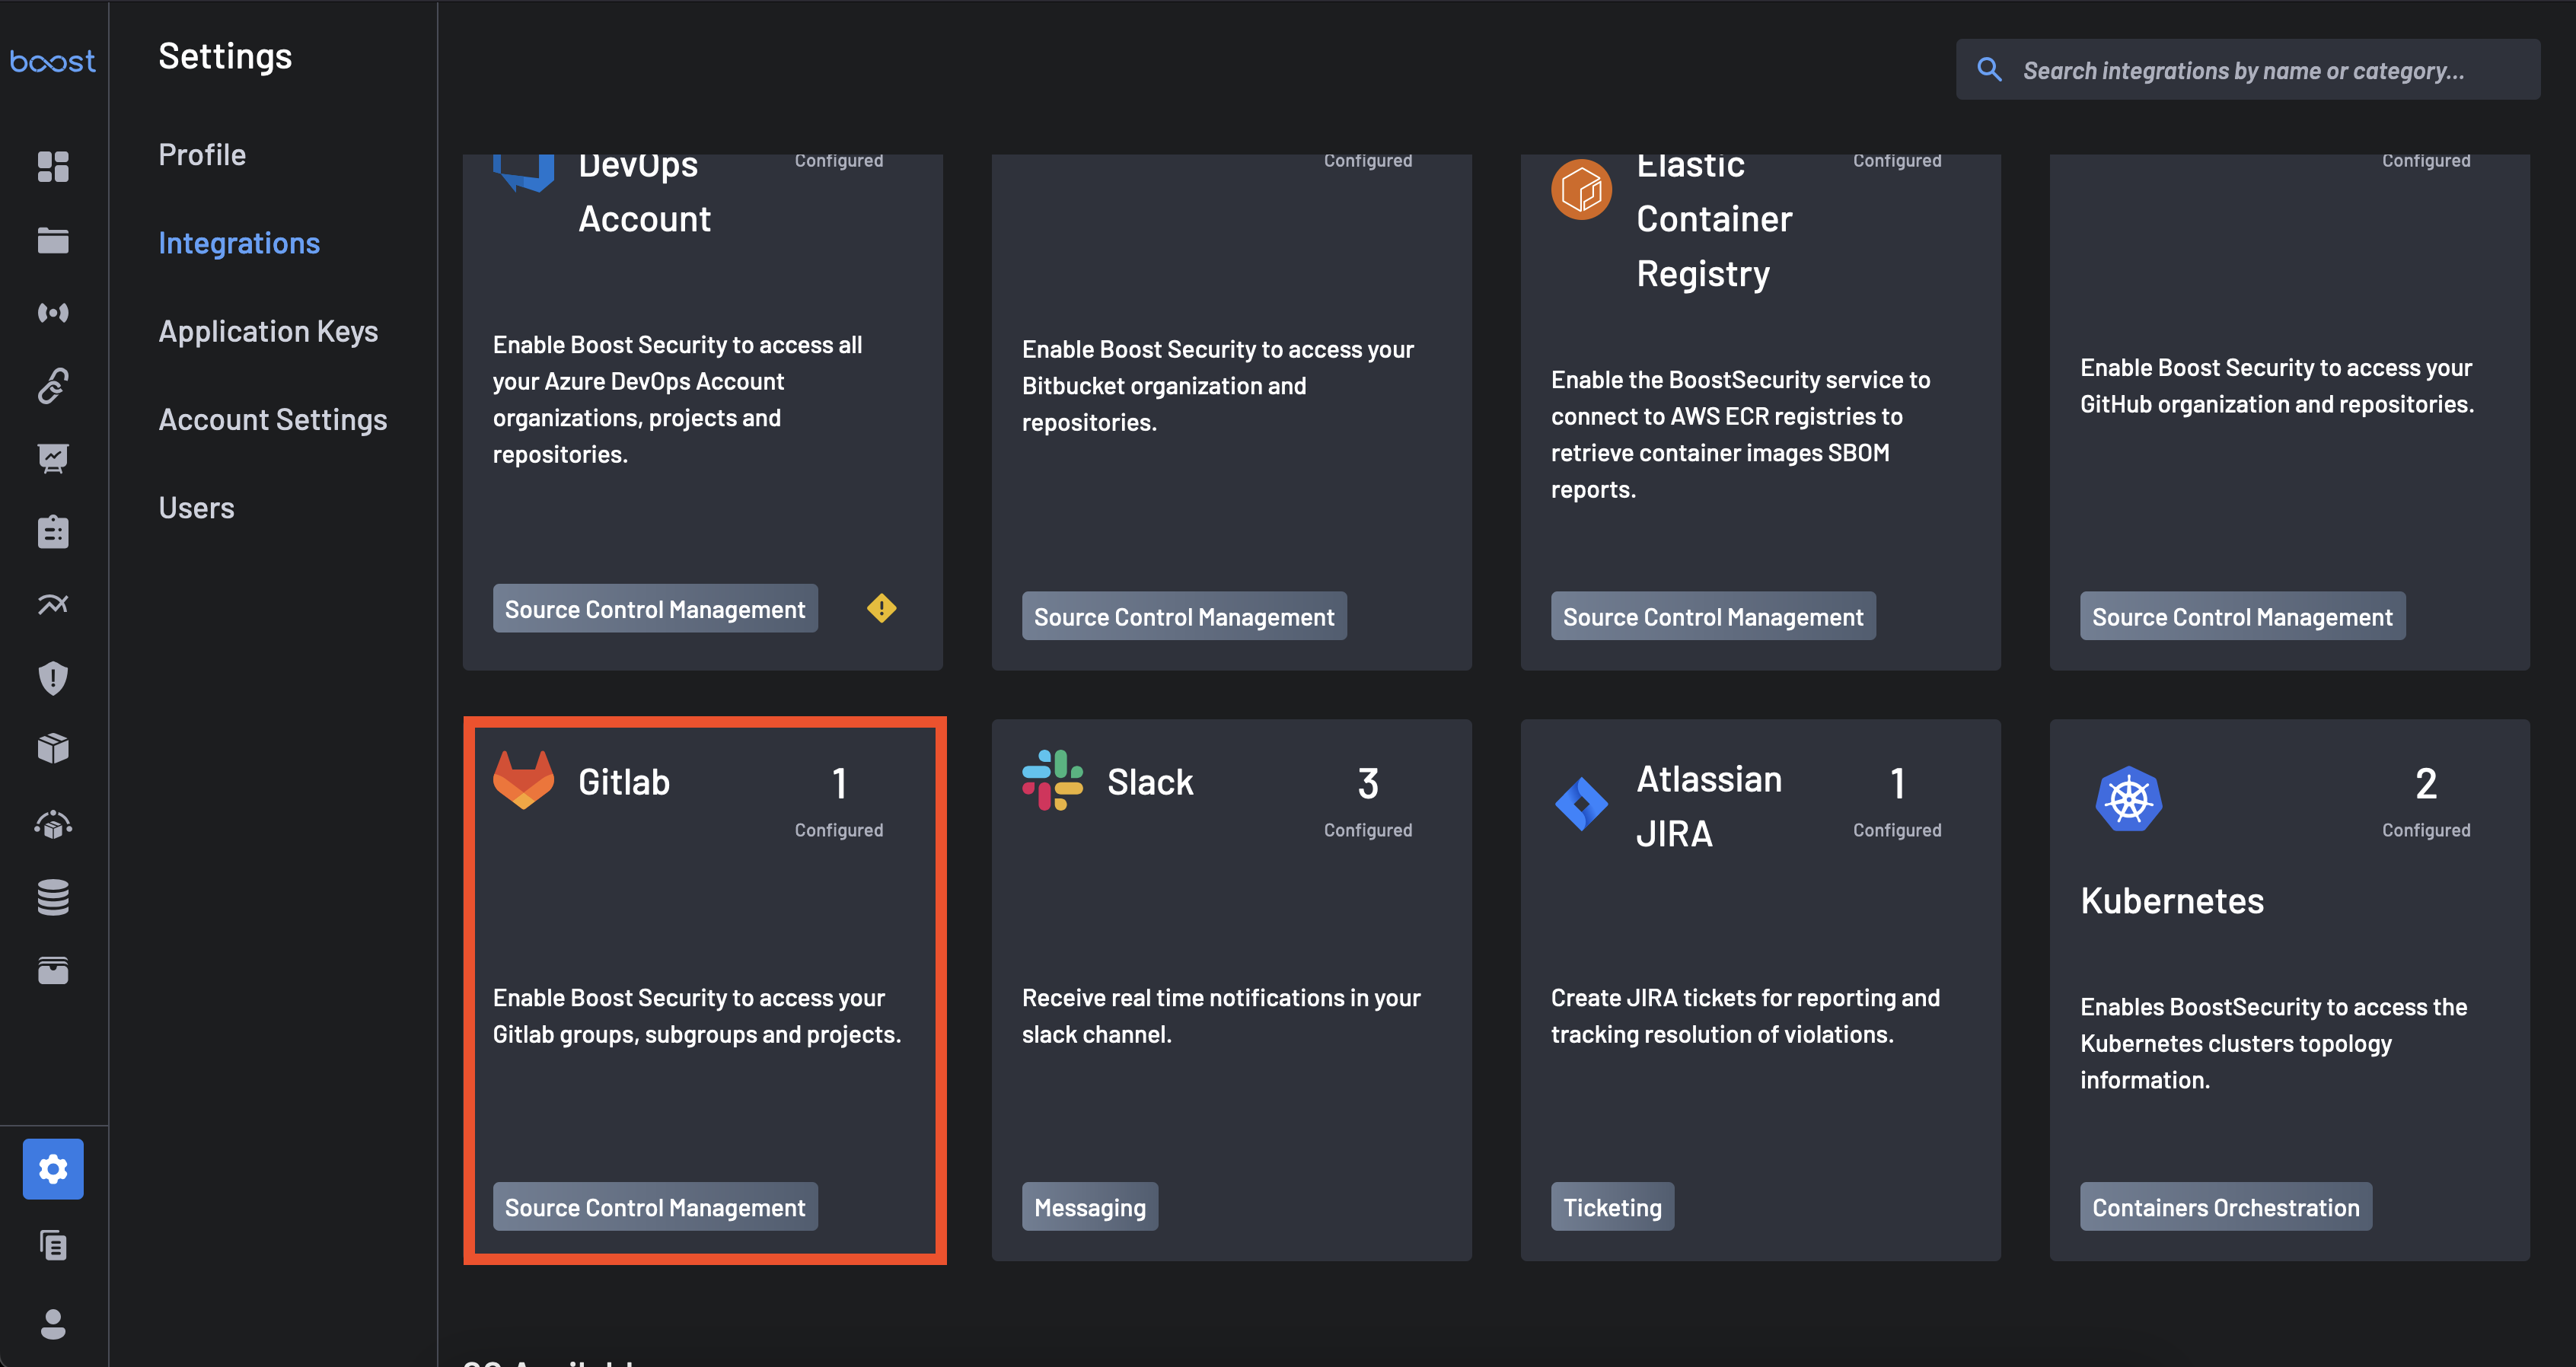
Integrations page. -
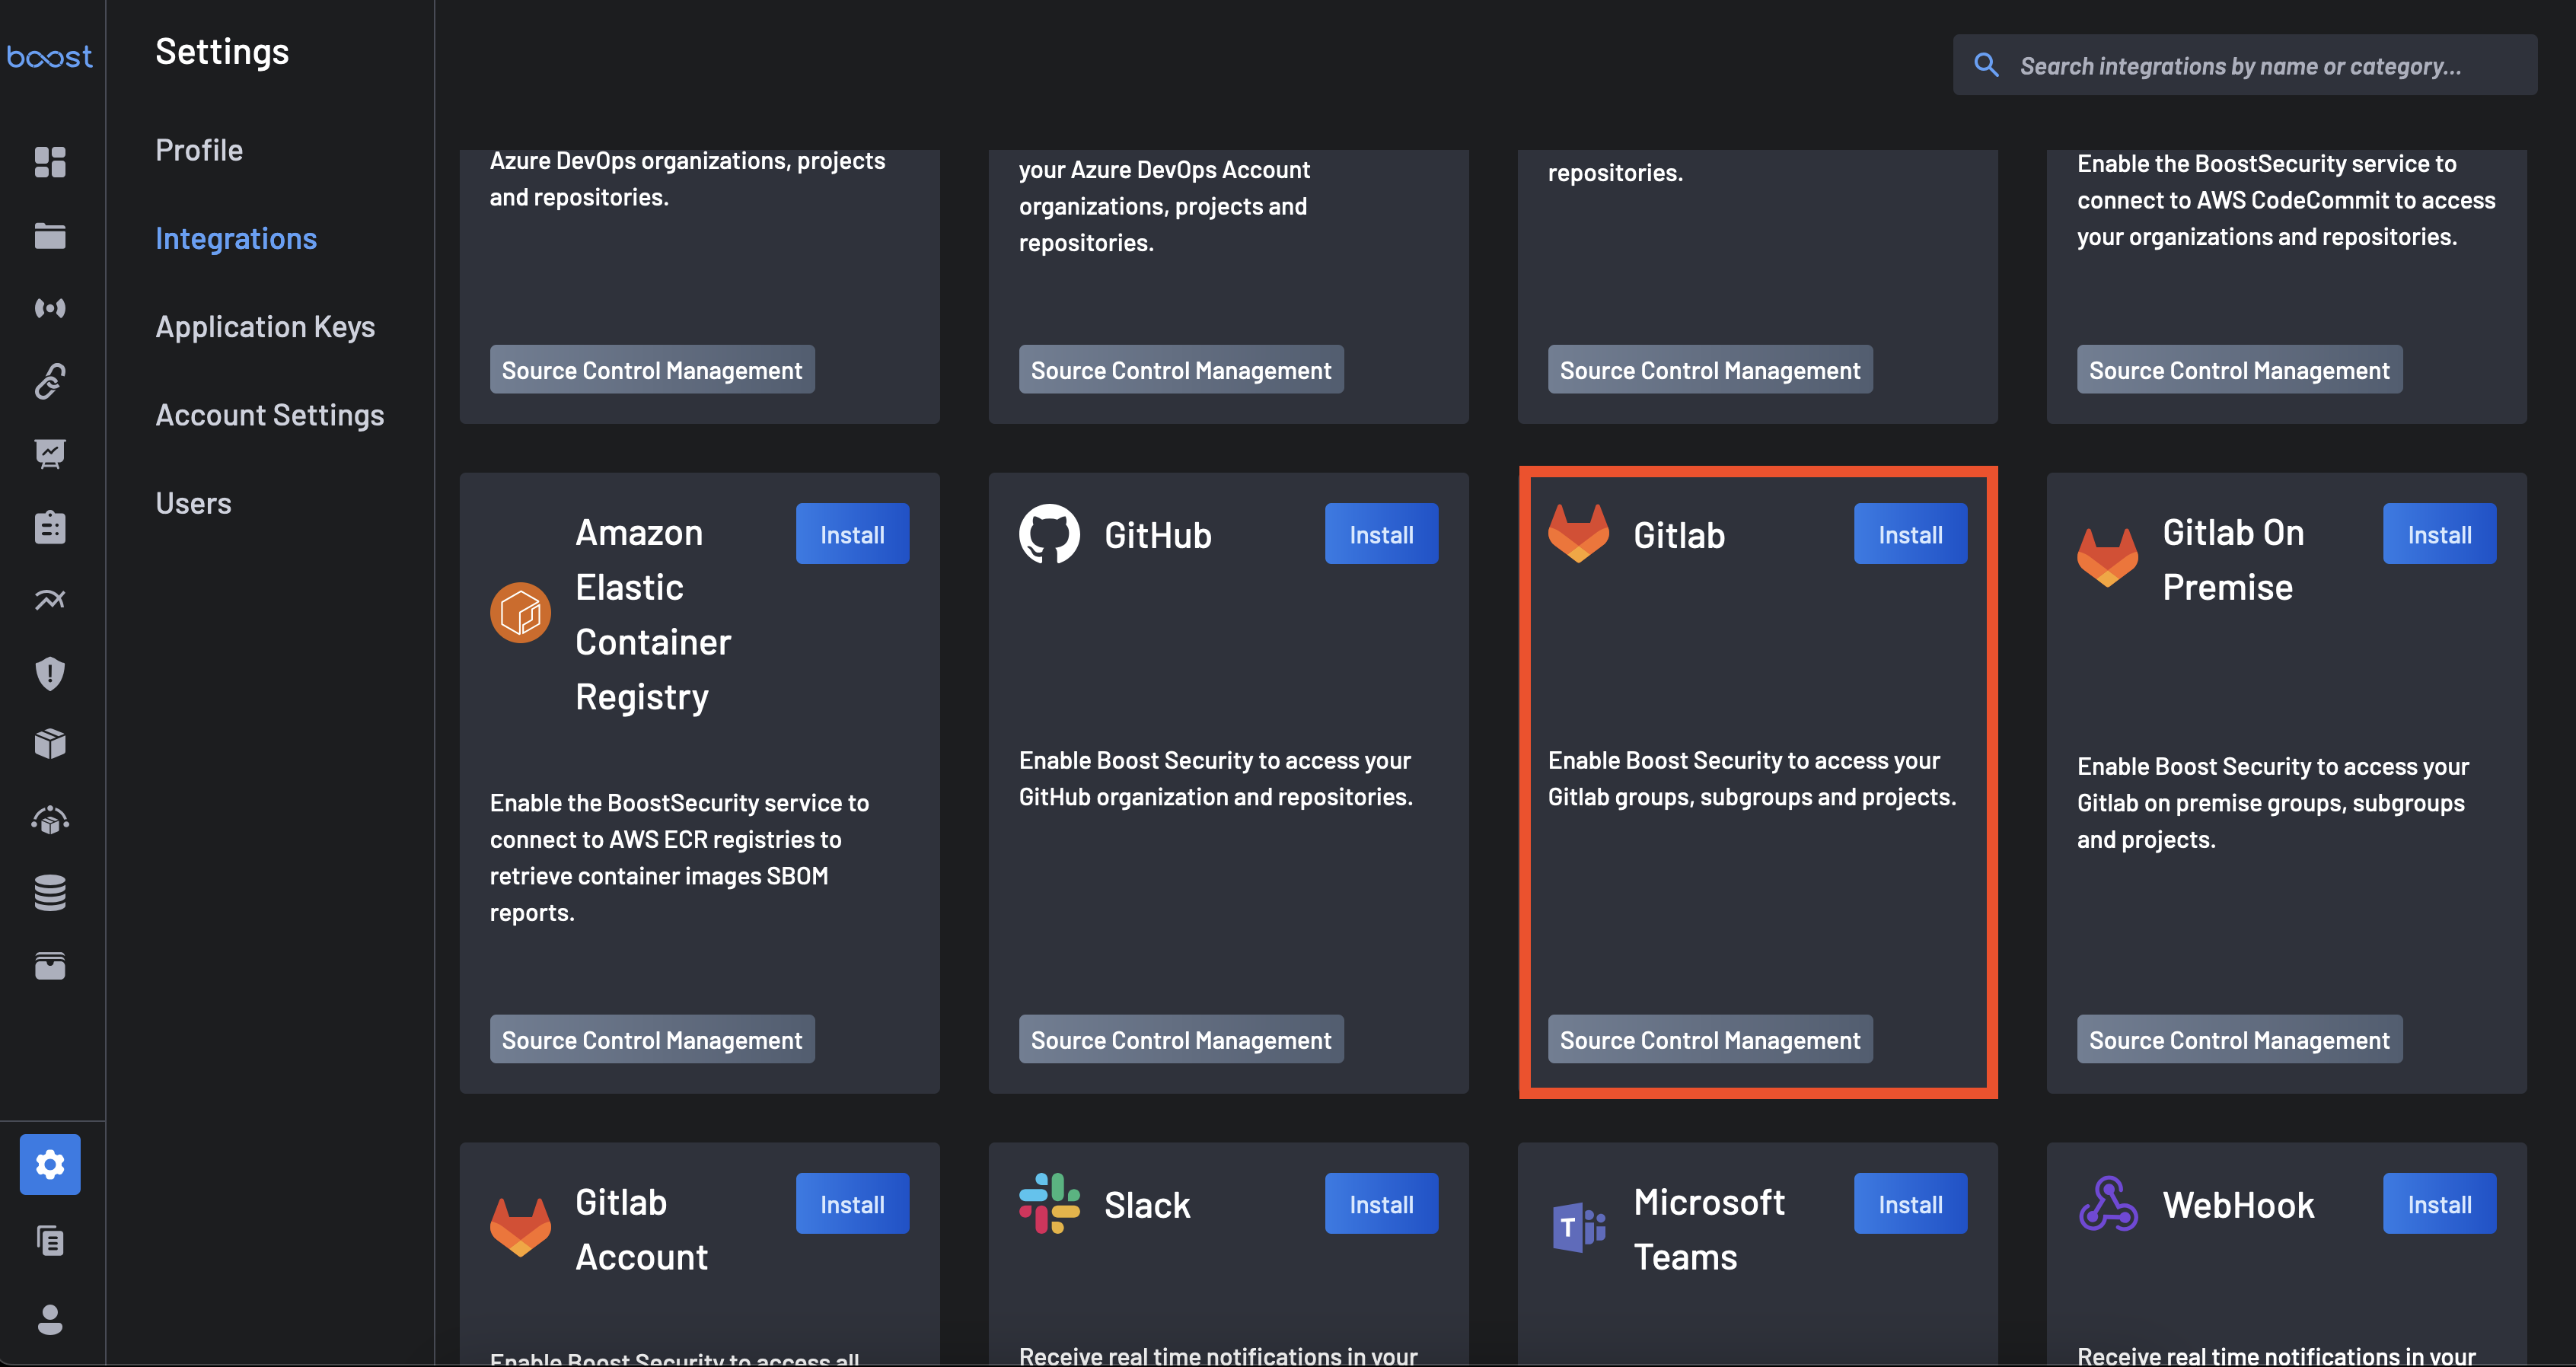
Click the Install button that is on the GitLab Integration Card underneath the
Availablesection. -
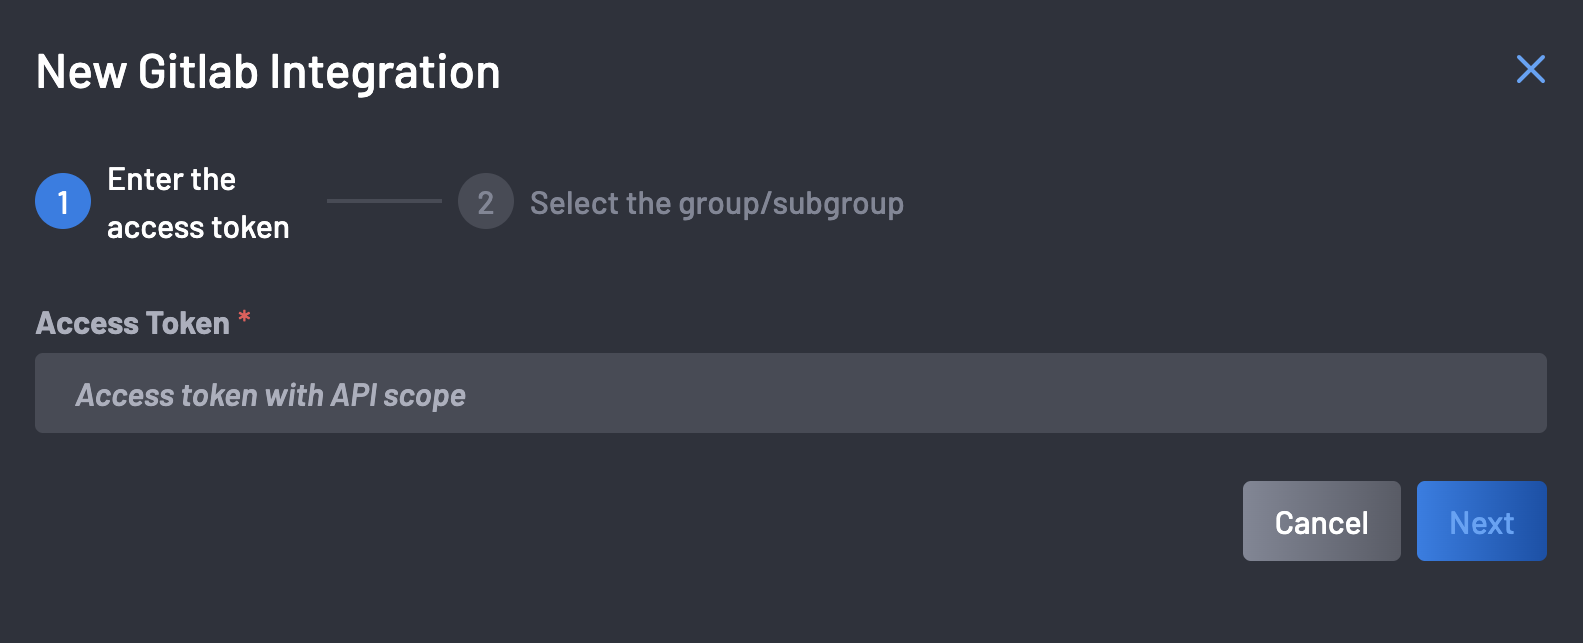
A modal will appear, requesting the GitLab Access Token. Provide the Access Token and click Next.
-
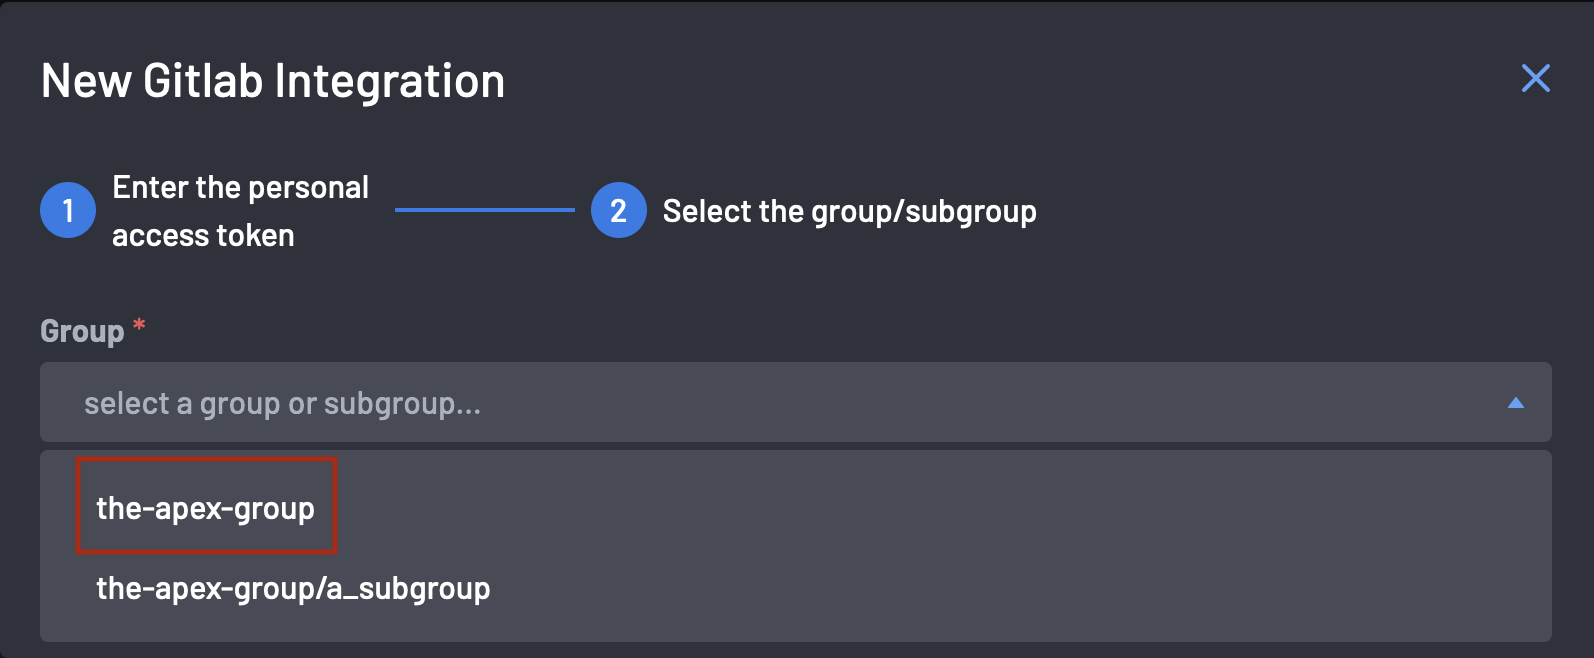
Select the GitLab Group you are interested ingesting repositories for into Boost. It is advised that the root group is selected, as that will ingest all subgroups into Boost at once. Once a group is selected, click Complete
Once the installation completes, the BoostSecurity GitLab integration is successfully installed. Continue your BoostSecurity journey, by installing Zero Touch Provisioining.
Edit an installed BoostSecurity GitLab Integration
In the event an adjustment needs to be made to an installed GitLab Integration, the following instructions are provided:
-
Navigate to the
Integrations page. -
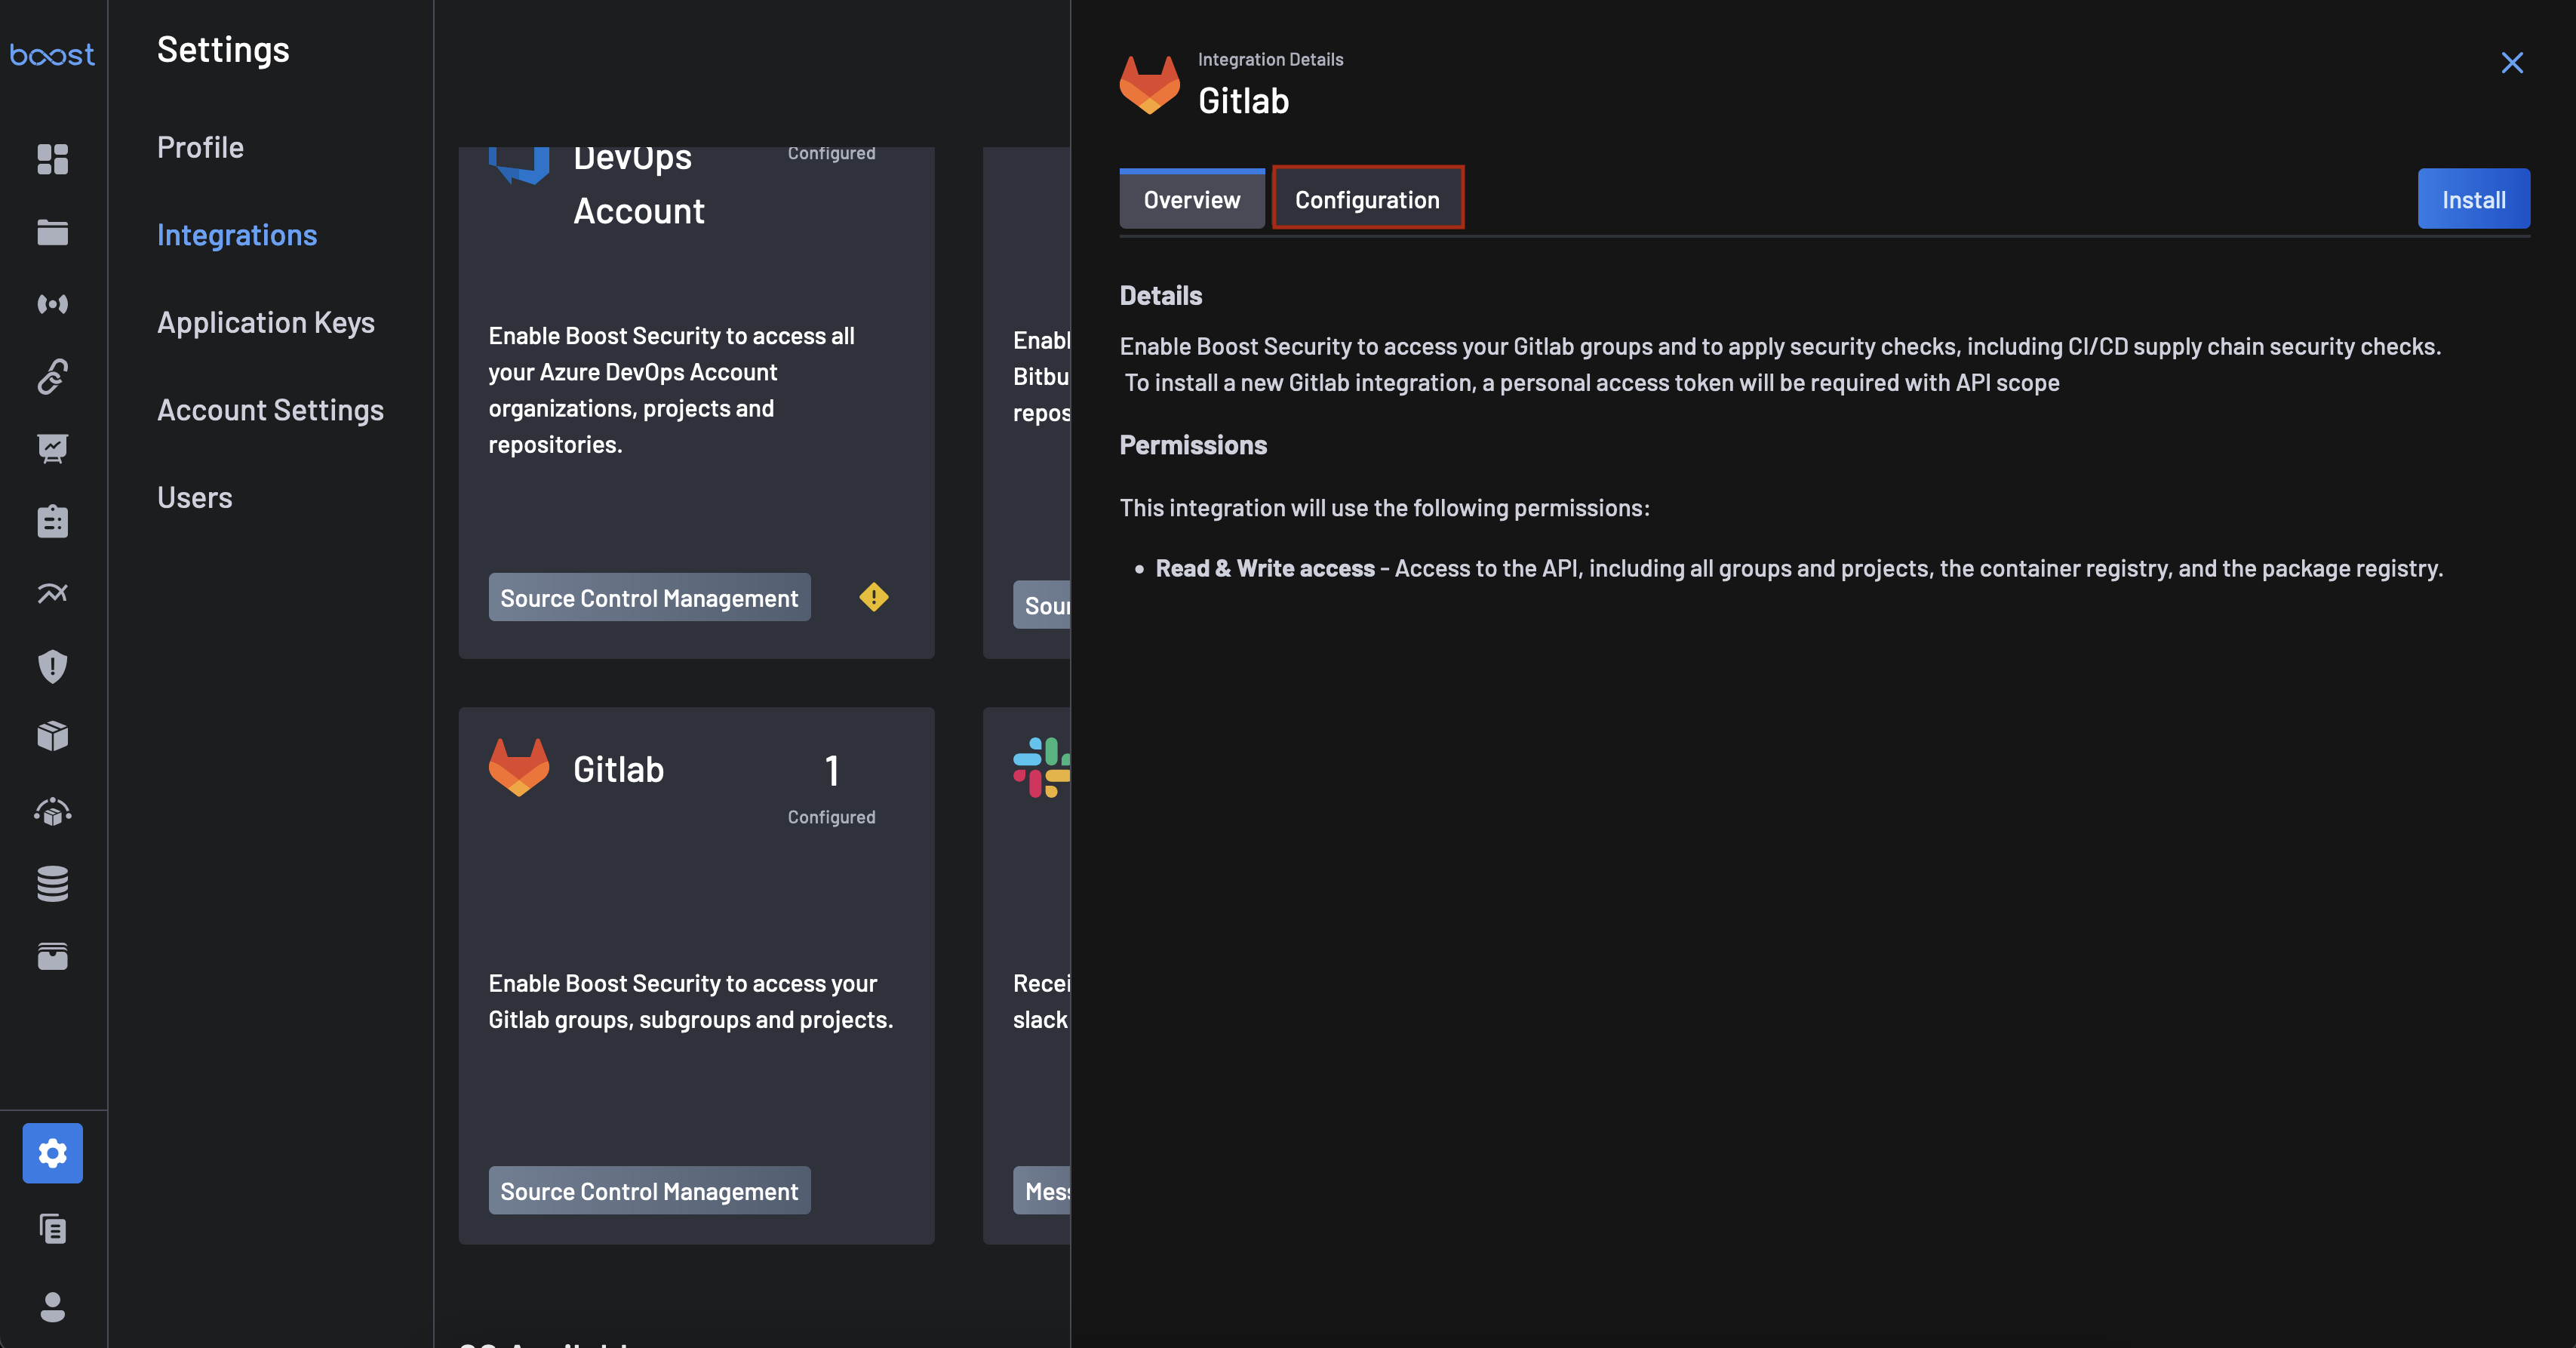
Click on the GitLab Integration Card underneath the
Installedsection. -
Click the
Configurationtab. -
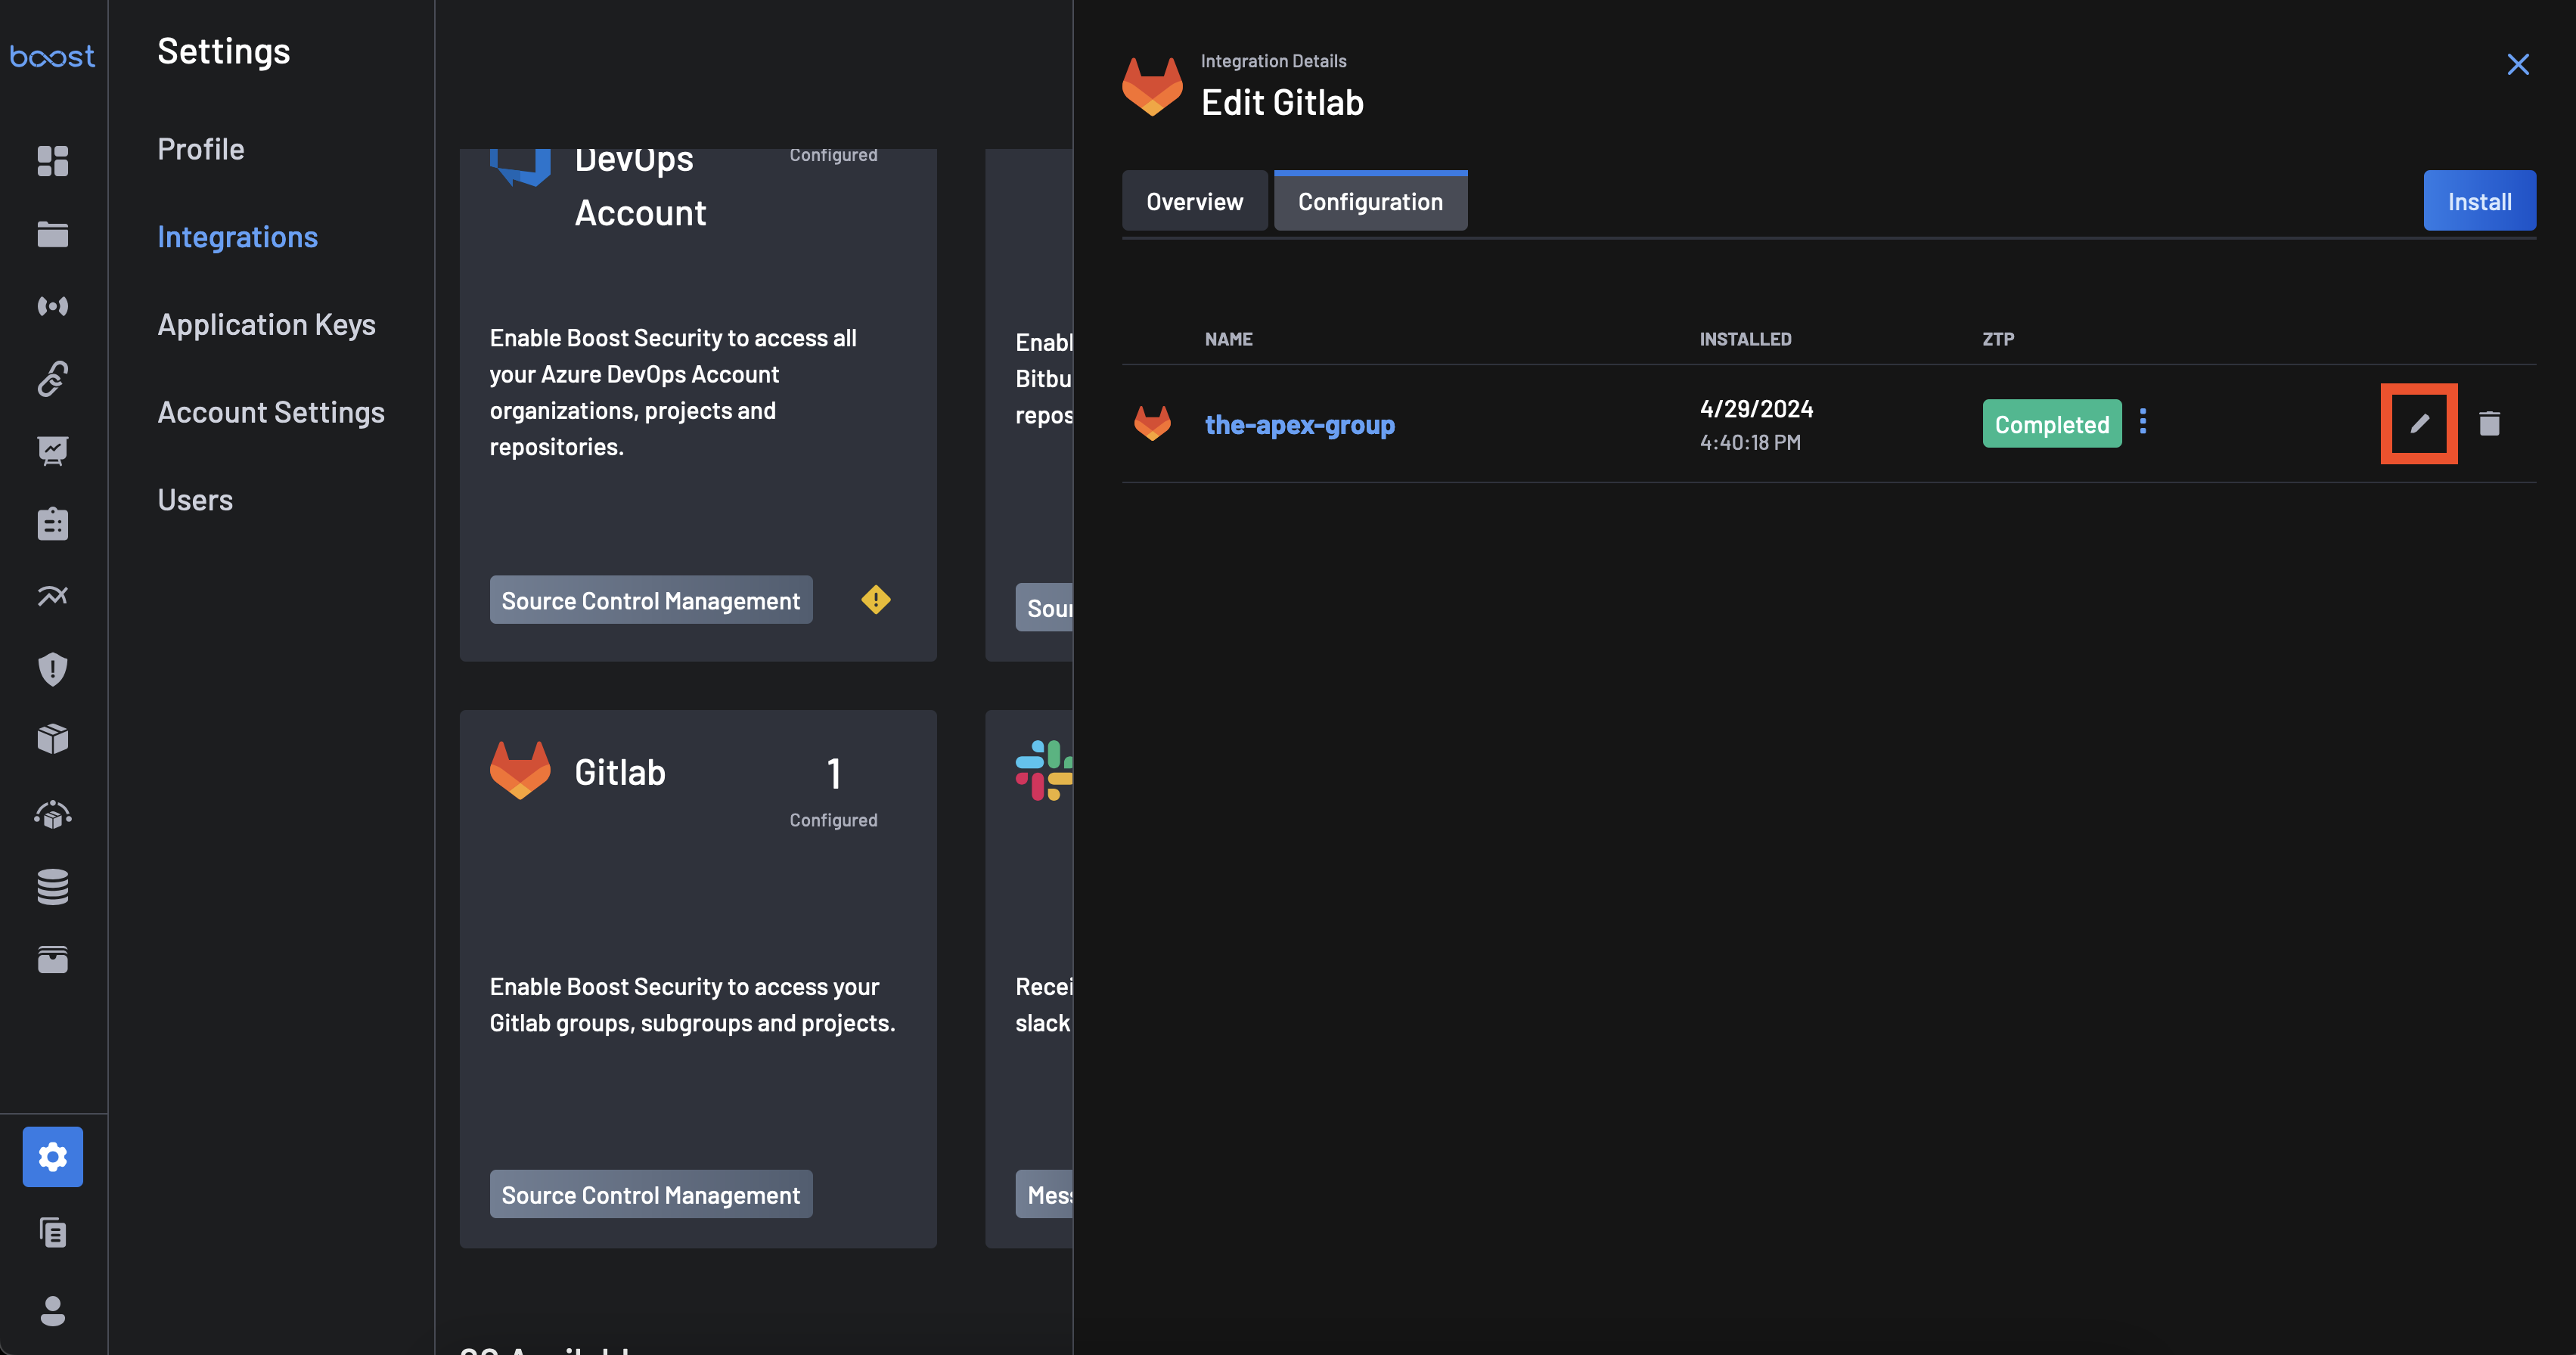
Click the pencil icon associated with the GitLab Integration you wish to edit.
-
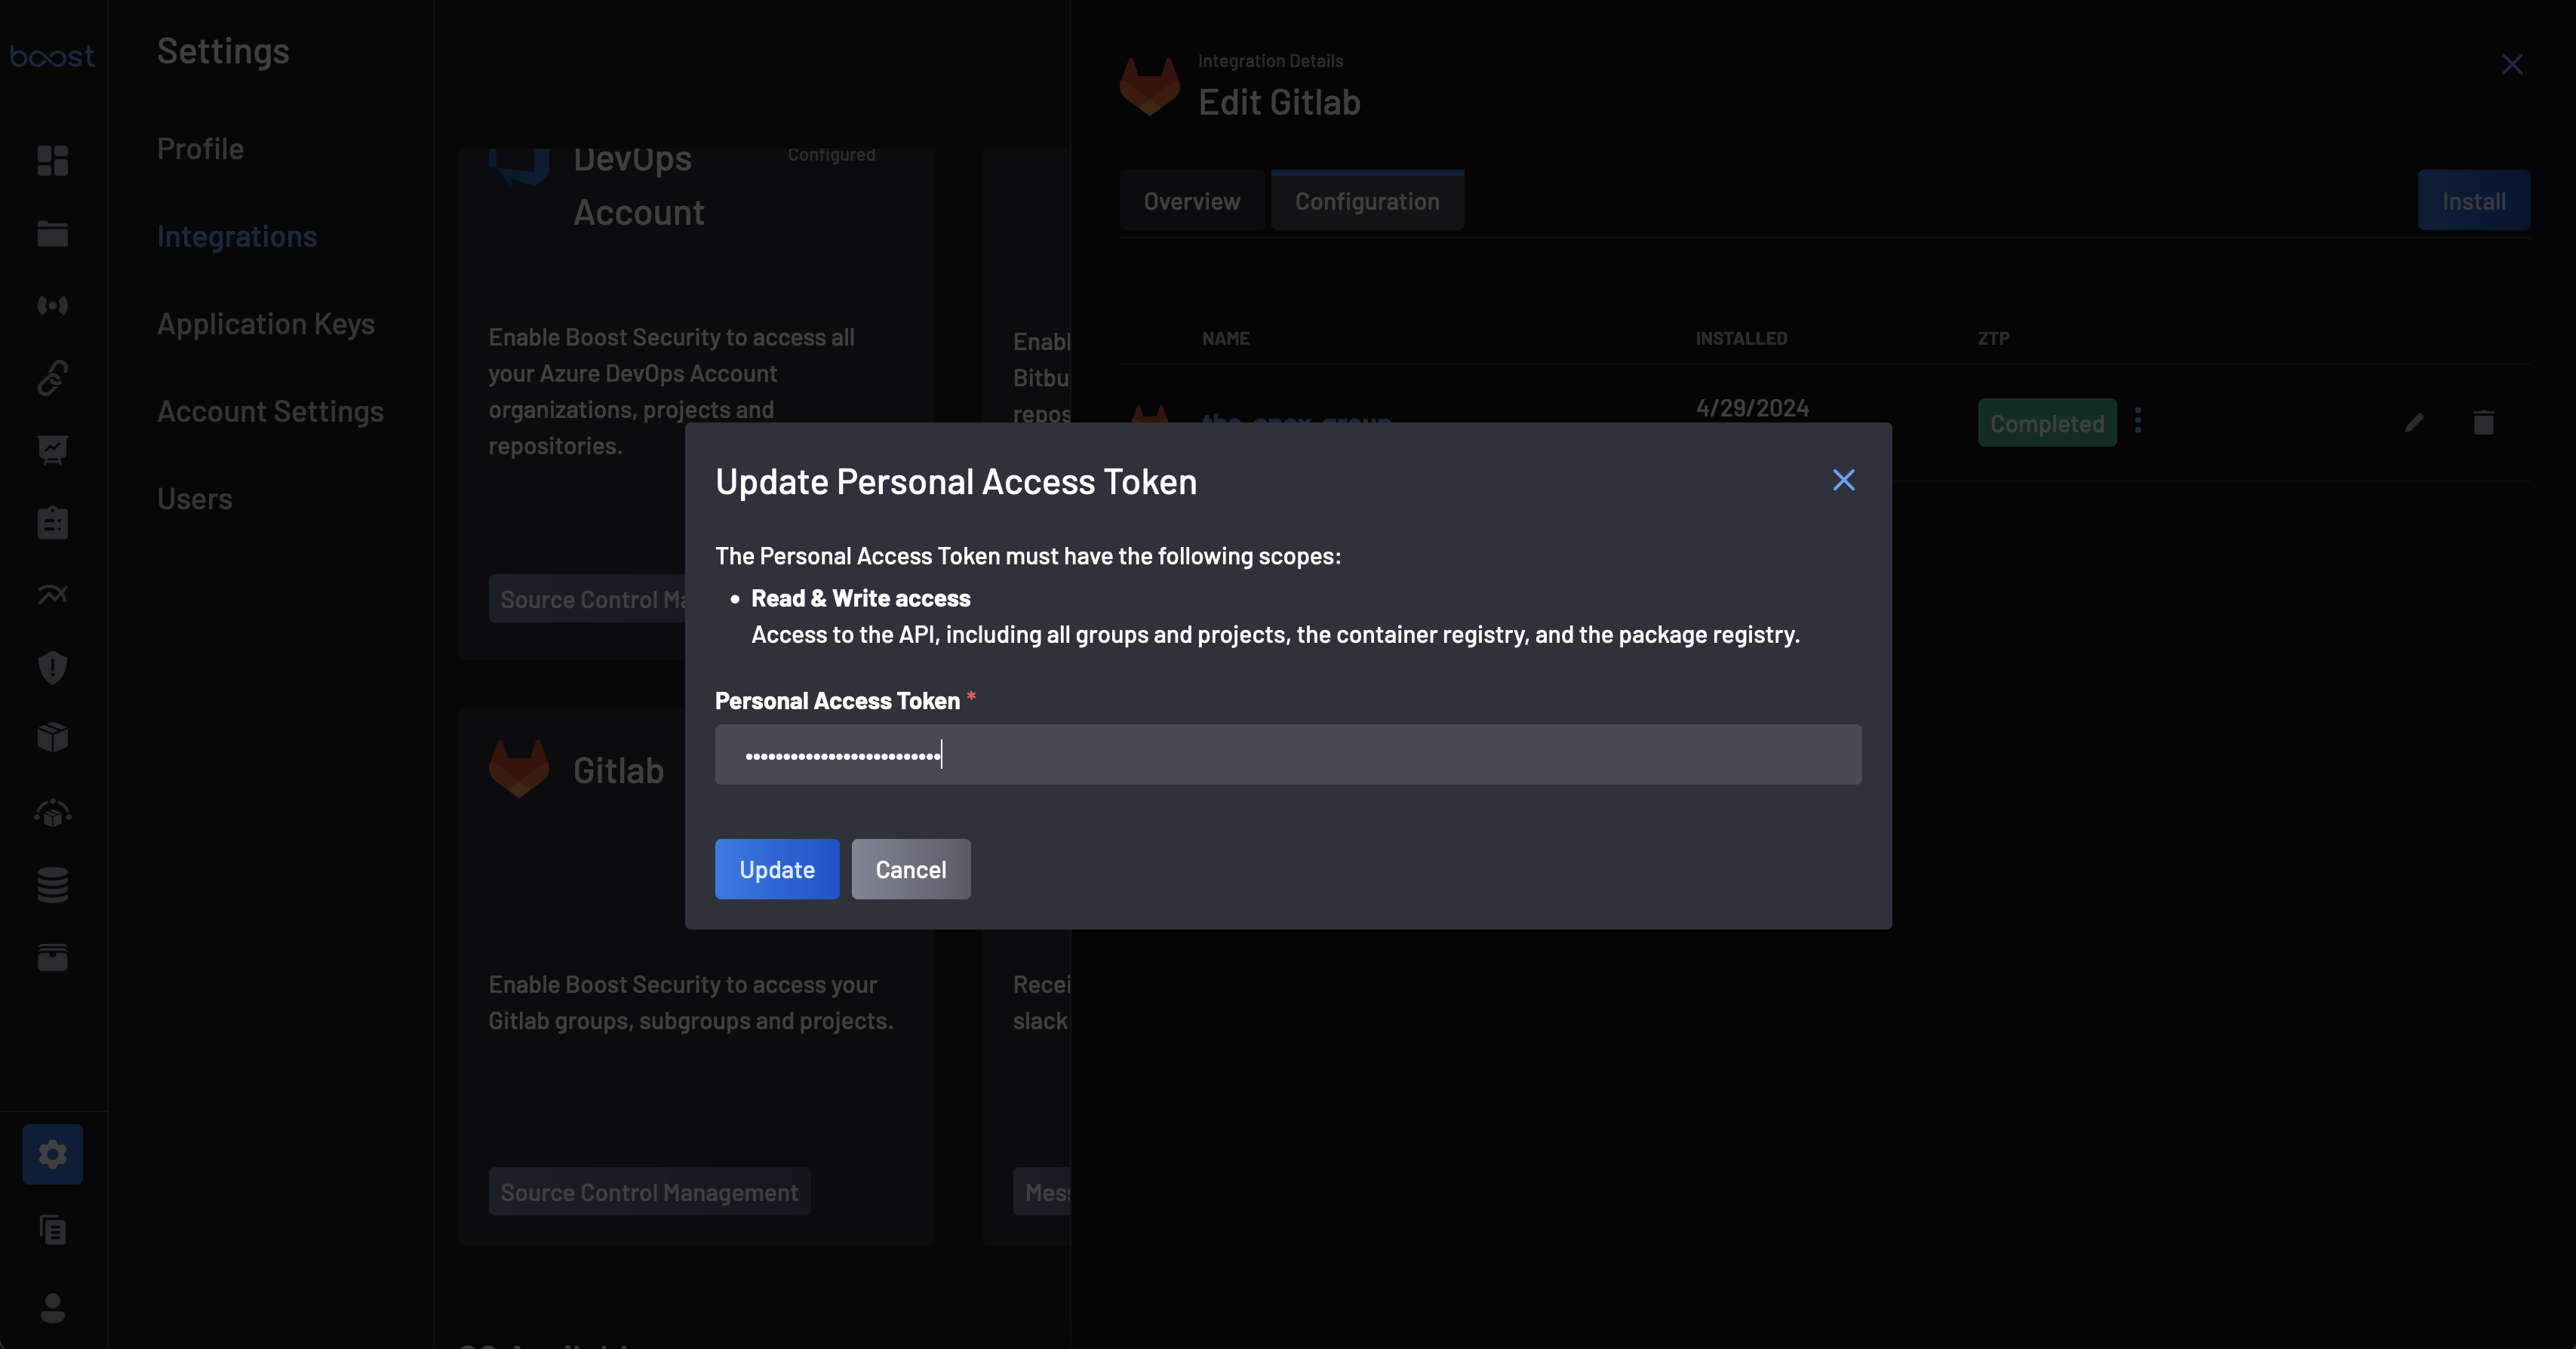
Provide an Access Token that has the
apiscope and clickUpdate.
Zero Touch Provisioning for GitLab
-
Go to the Integrations page, select your GitLab integration and click on the configuration tab.
-
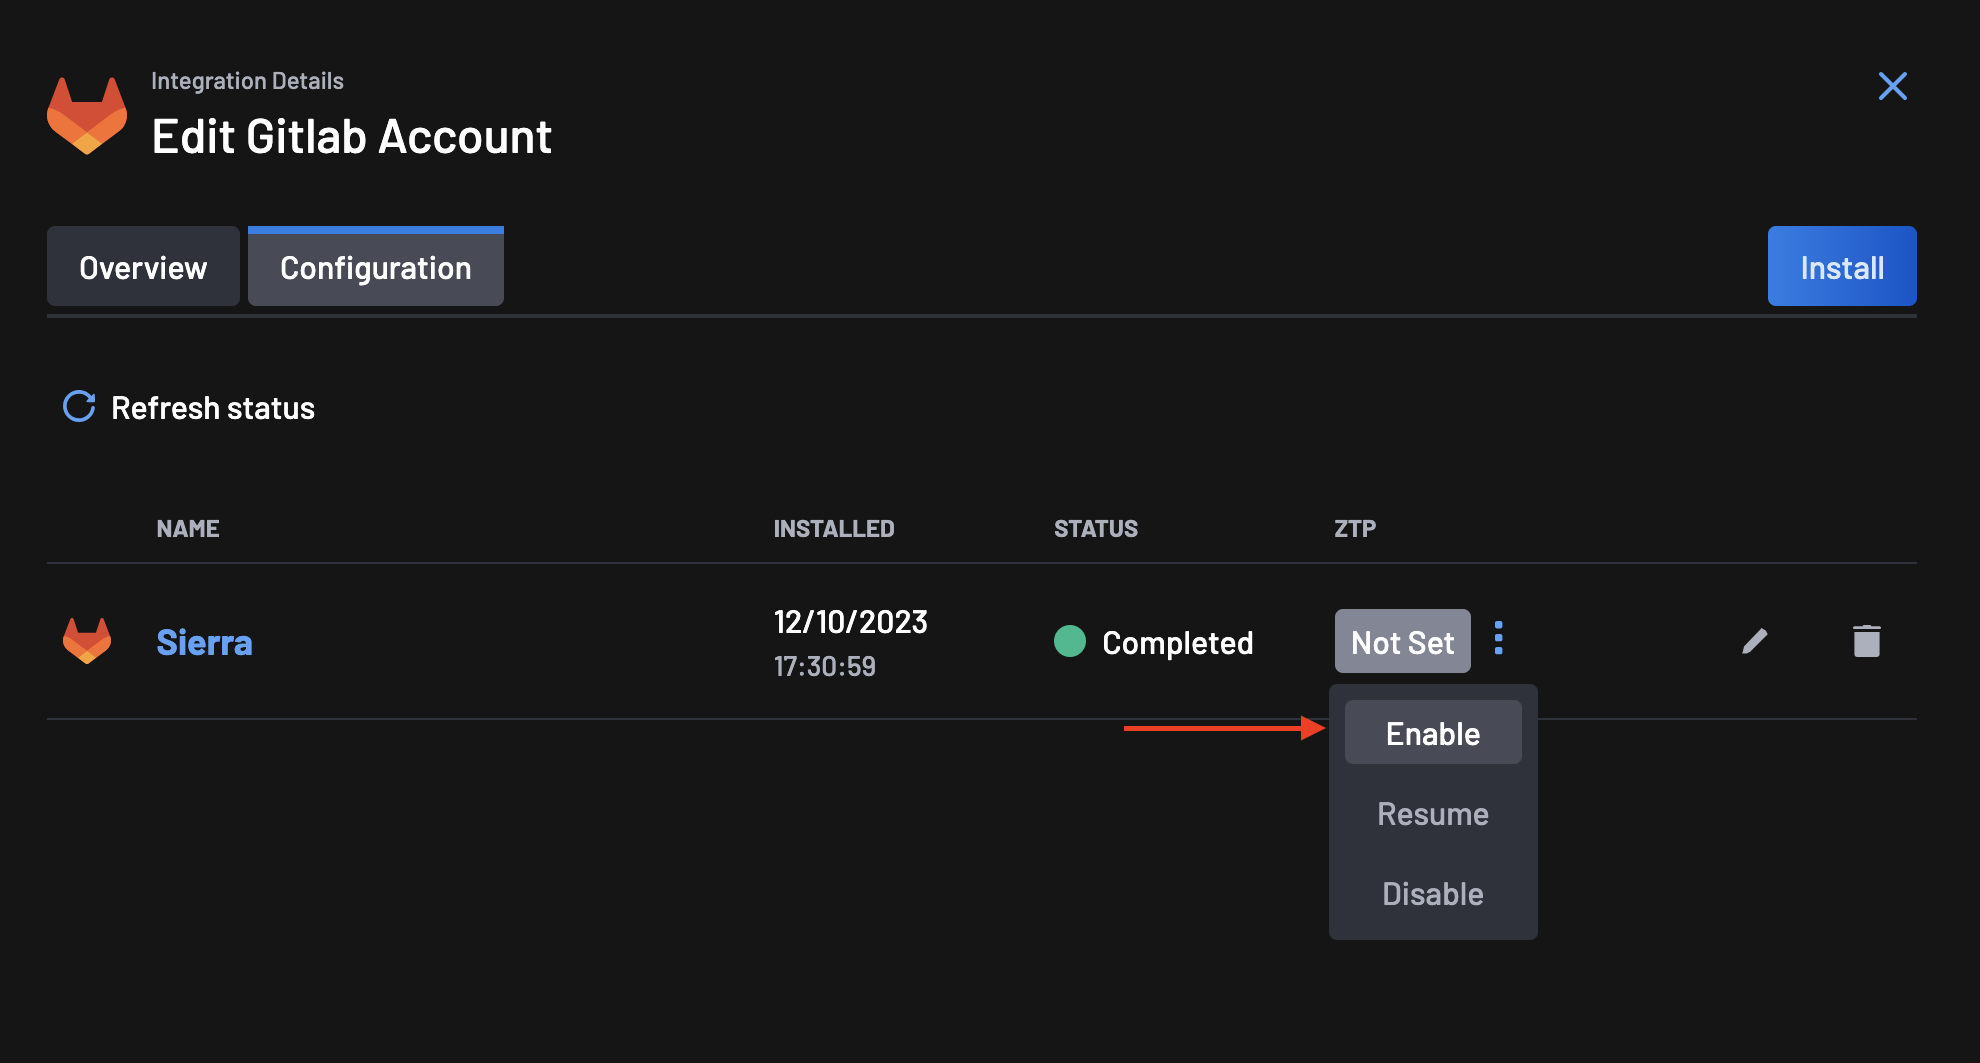
On the ZTP column, you will notice that the status is set to Not Set. Click on the menu next to the status and select Enable.
-
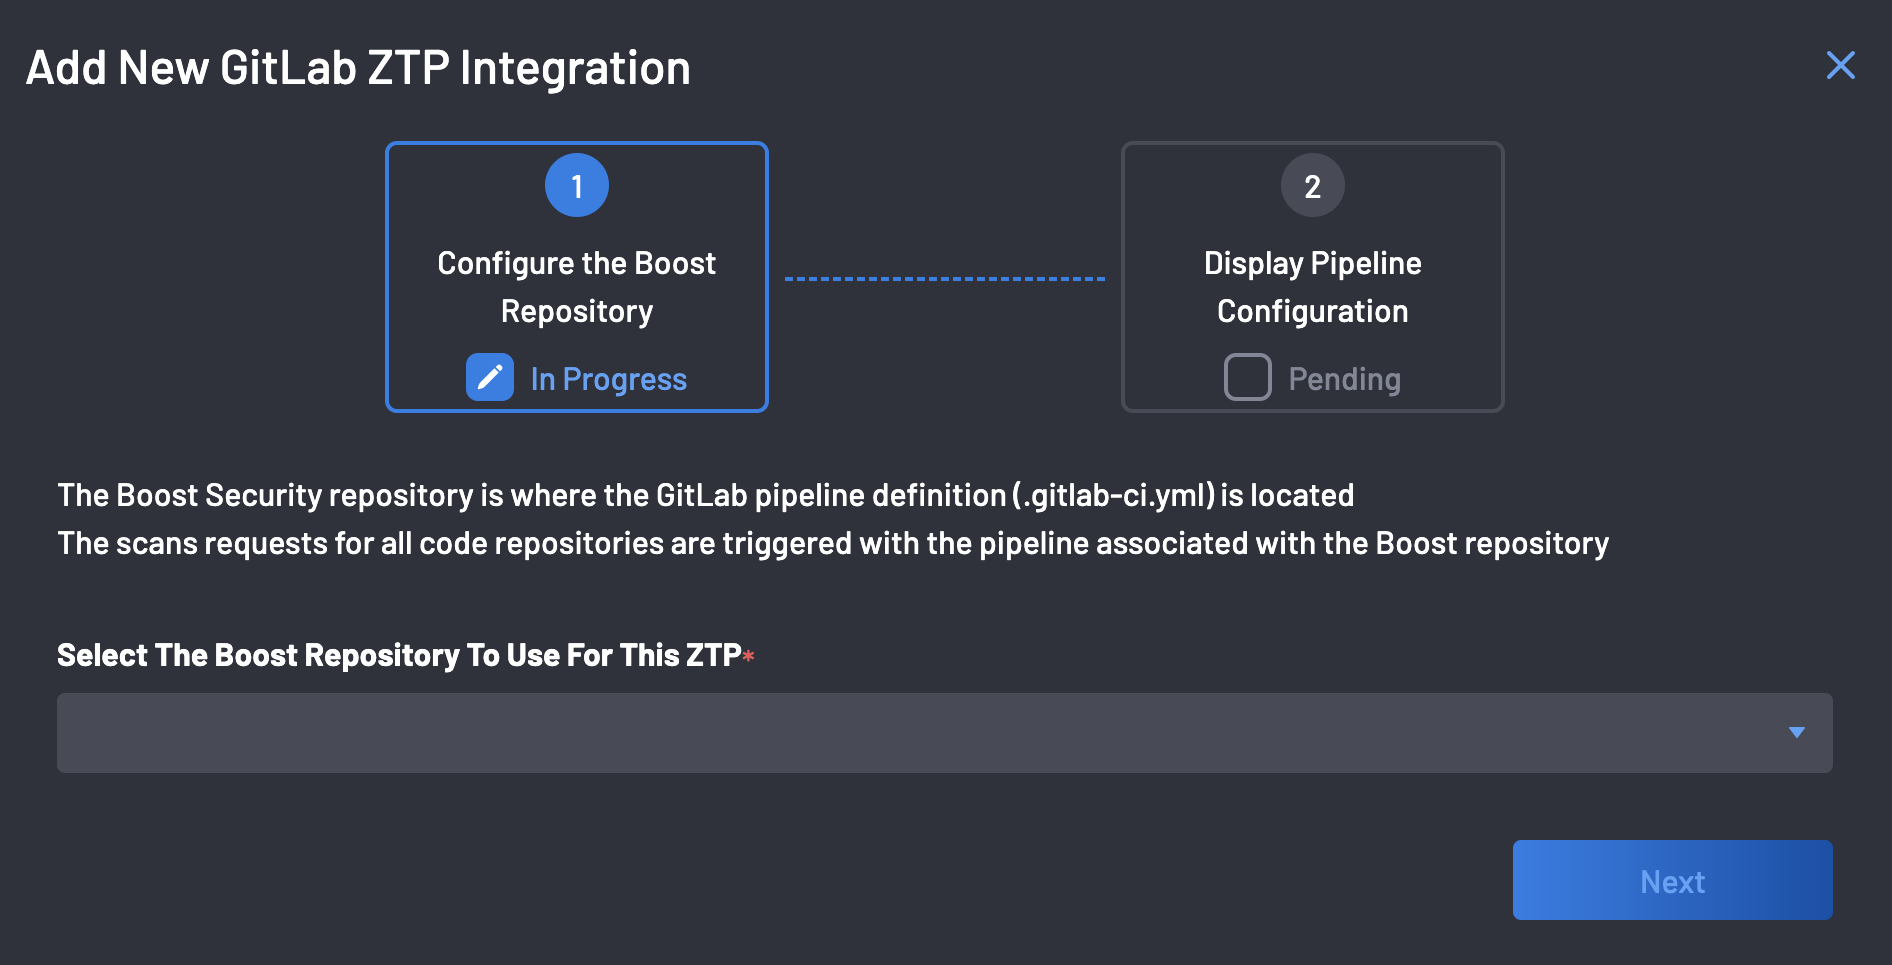
The ZTP wizard configures your GitLab organization's
boostrepository, where the GitLab pipeline definition (.gitlab-ci.yml) is located. -
Select the
boostrepository on your organization from the dropdown as shown above and click the Next button. -
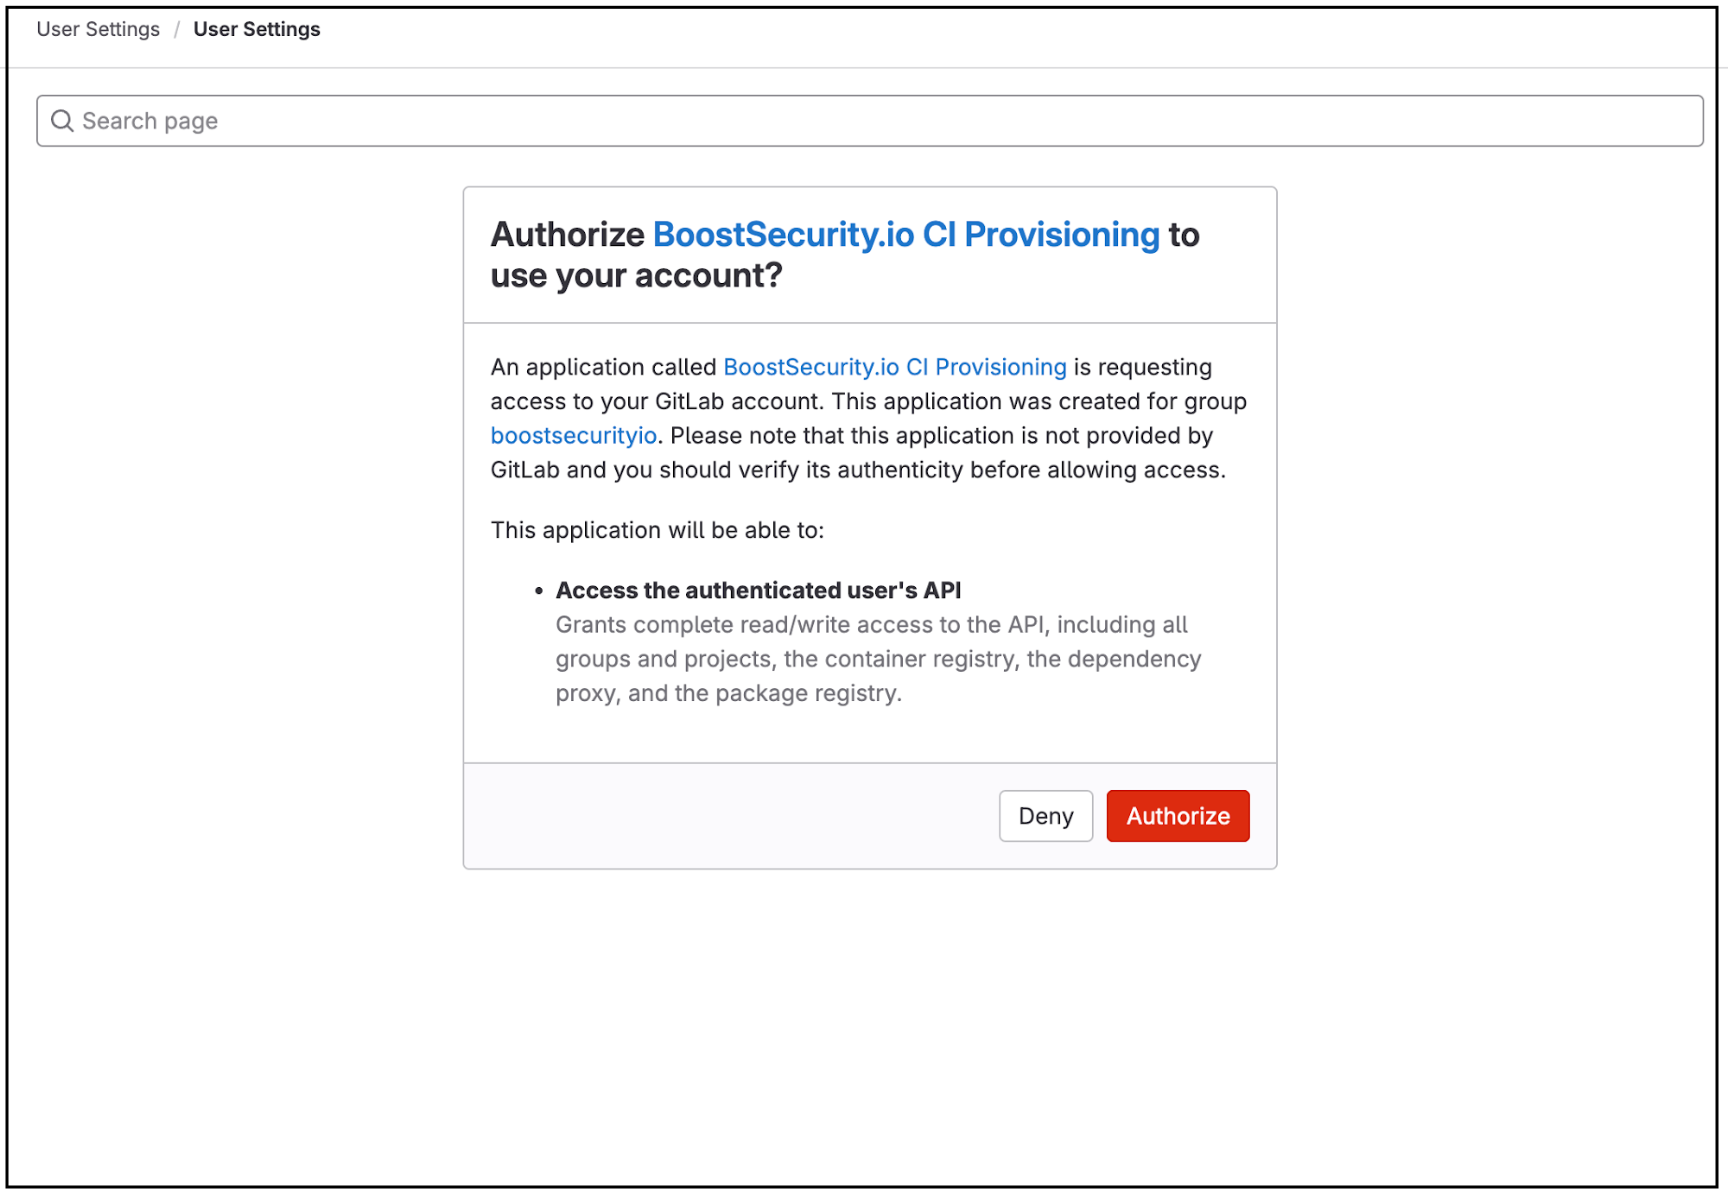
Authorize the BoostSecurity.io CI provisioning on all organizations. Click on the Authorize button at the bottom of the page.
-
The pipeline configuration is complete following a successful CI pipeline setup!
Note
By clicking the Enable Boost Recommended Scanners button, Boost will provision multiple scanners for every repository it has access to. These scanners will then request new scans to be conducted for each of those repositories. Please note that this process would have a financial impact on your services, so ensure that this is the correct course of action before proceeding.
If you are connecting to a large collection of repos, you may want to enable scanning in a more targeted manner.
Zero Touch Provisioning is now enabled!!!
Next Steps
It is recommended to enable default scanner protection for your GitLab organization, and then proceed to build your first custom policy, where you would define specific actions for security events identified by configured scanners.
