Integrate GitHub with BoostSecurity
BoostSecurity lets you connect your GitHub organization and apply security checks, including CI/CD supply chain security checks and Dependabot.
Prerequisites
As a pre-requisite to installing the application:
- Ensure you have a GitHub organization and the following permissions in place.
- Ensure you have created a
.boostrepository within your organization's SCM, which should contain aREADME.mdfile.
Permissions
This integration will use the following permissions:
- Read access - Actions, Dependabot alerts, webhooks, administration, metadata, secret scanning alerts, workflows, and security events.
- Read & Write access - Checks, Issues, Pull Requests.
1. Connect GitHub to BoostSecurity
To install the GitHub App on your GitHub organization:
-
Navigate to Settings on the navigation panel and select Integrations;
Settings > Integrations. -
Select the GitHub integration from the Available section.
-
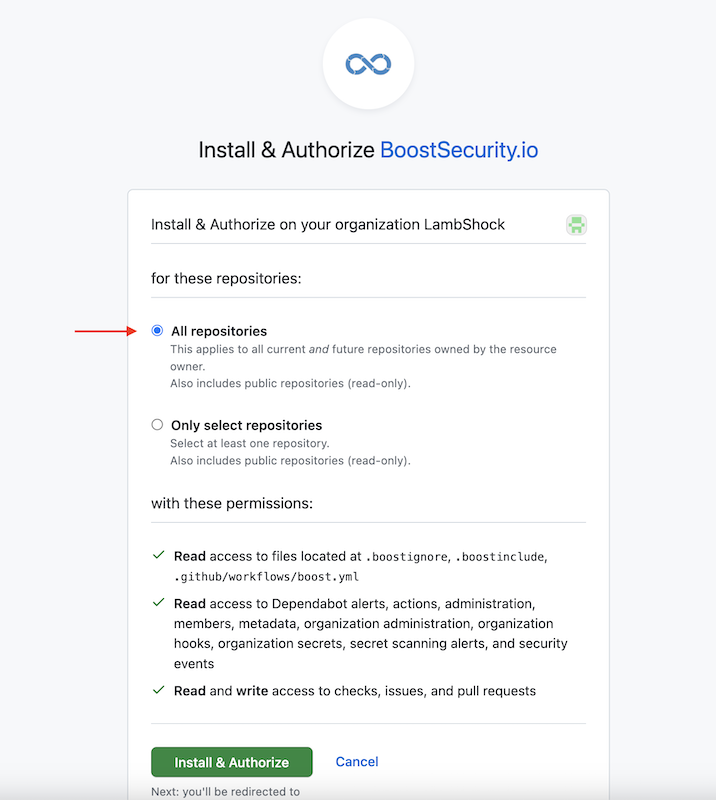
Select Install: You will be directed to the GitHub App to install the BoostSecurity GitHub App.
- Select the appropriate GitHub organization on your account you want to install the BoostSecurity GitHub App.
-
Select whether to install the GitHub App on All repositories or Only select repositories. It is recommended to install it for all repositories so that it makes it simpler to add the security scanner to new repositories.
-
Select Install and Authorize.
Once the installation is completed, the BoostSecurity GitHub card is added to the Settings > Integrations > Installed section. At this point, the BoostSecurity GitHub App is installed on your GitHub organization!!!
2. Zero Touch Provisioning for GitHub
Follow these steps to set up Zero Touch Provisioning (ZTP) for GitHub.
-
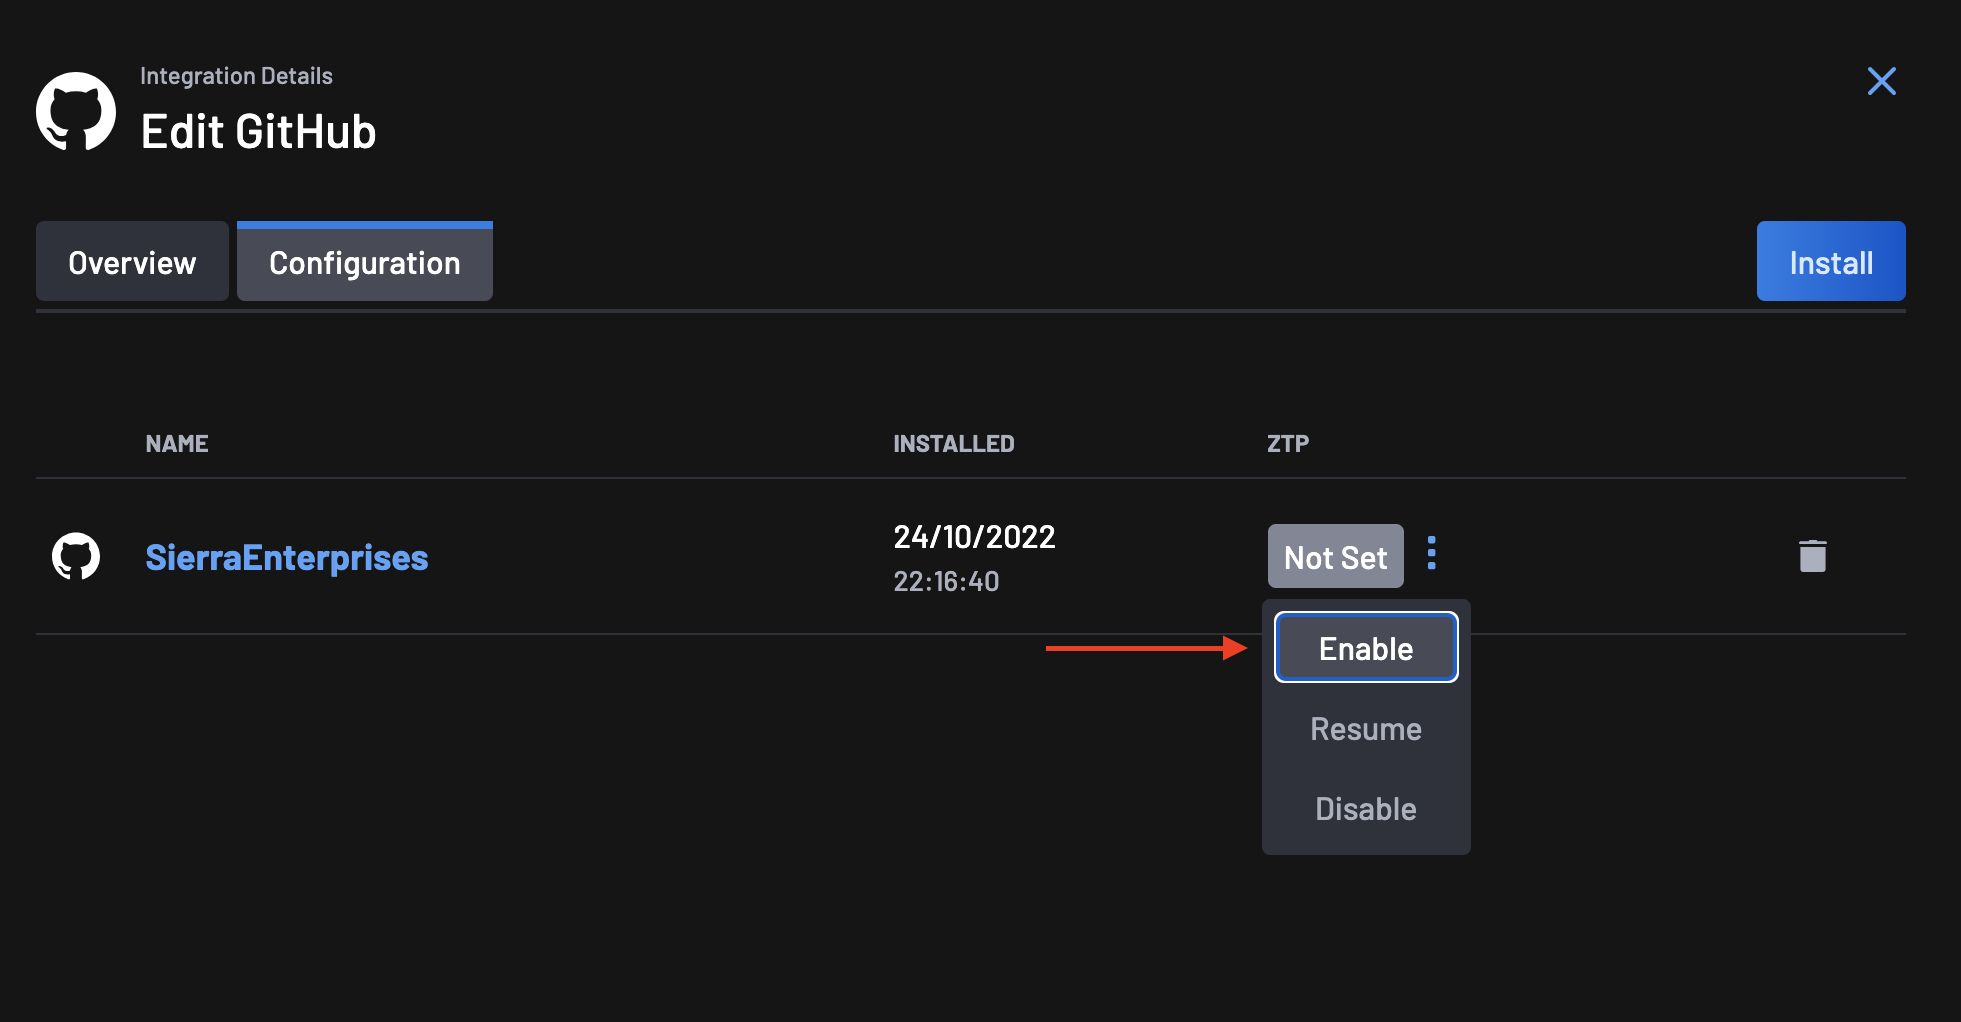
Go to the Integrations page, select your GitHub integration and click on the
Configurationtab. -
On the ZTP column, you will notice that the status is set to Not Set. Click on the menu next to the status and select Enable.
-
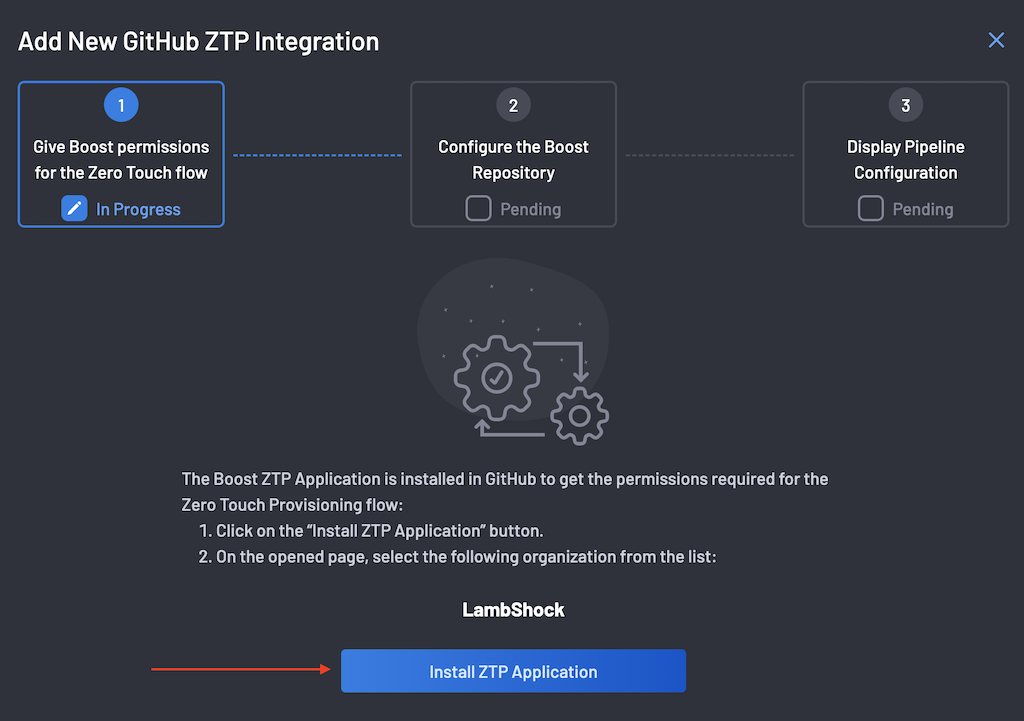
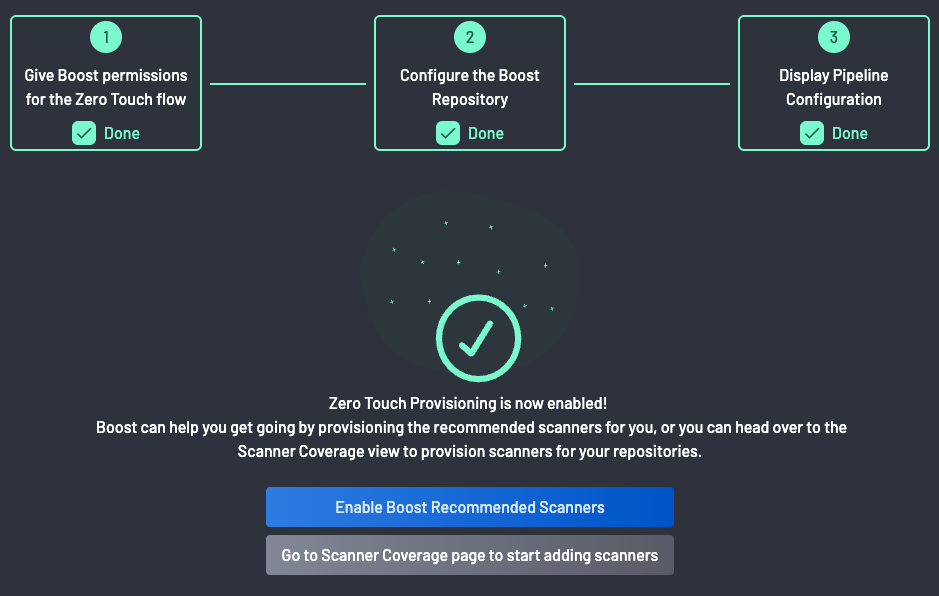
On the ZTP Wizard, the first step is to give BoostSecurity permissions for the Zero Touch Flow on your GitHub Organization.
-
Click the Install ZTP Application button to redirect you to your GitHub organization.
-
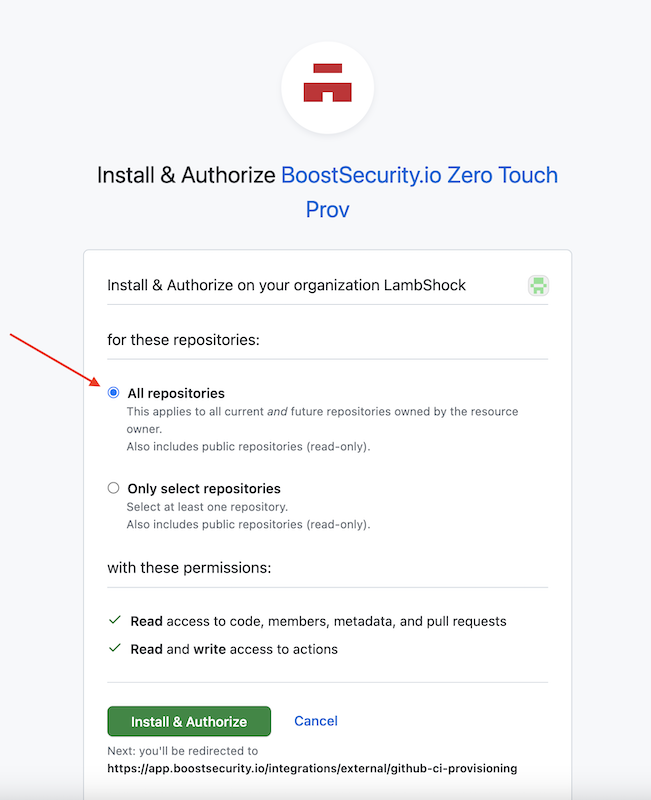
Install and authorize the BoostSecurity.io Zero Touch provisioning on all organizations. Click on the Install & Authorize button at the bottom of the page.
-
BoostSecurity configures the
.boostrepo on successful BoostSecurity.io Zero Touch Provisioning installation. -
The pipeline configuration is ready after a successful
.boostrepo configuration!Note
By clicking the Enable Boost Recommended Scanners button, Boost will provision multiple default for every repository it has access to. These scanners will then request new scans to be conducted for each of those repositories. Please note that this process would have a financial impact on your services, so ensure that this is the correct course of action before proceeding.
If you are connecting to a large collection of repos, you may want to enable scanning in a more targeted manner.
Zero Touch Provisioning is now enabled!!!
Next Steps
It is recommended to enable default scanner protection for your GitHub organization, and proceed to build your first custom policy, where you would define specific actions for security events identified by configured scanners.


